
Before you start
Prepare your letter in your usual document editor. Check the letterhead, recipient, date, reference, figures and contact details. Leave room near the closing for your stamp and any signature. Save a PDF, or use a DOCX and check its converted pages.
To try the workflow, verify your email for a 14-day personal trial with 10 completed documents total. Trial previews and outputs carry a trial footer. Compare trial access and paid plans.
Follow these steps
1. Choose the right company stamp
Create or upload your company artwork in Stamps, then save a version. Use artwork you are authorised to apply. A personal workspace can hold your stamps; shared team stamps require the appropriate plan and permissions.
2. Upload the final letter
Open Documents and upload the PDF or DOCX. For business correspondence across Africa, check that addresses, currency amounts and telephone numbers are correct. Inspect the letterhead and page breaks after Word conversion.
3. Place and resize the stamp
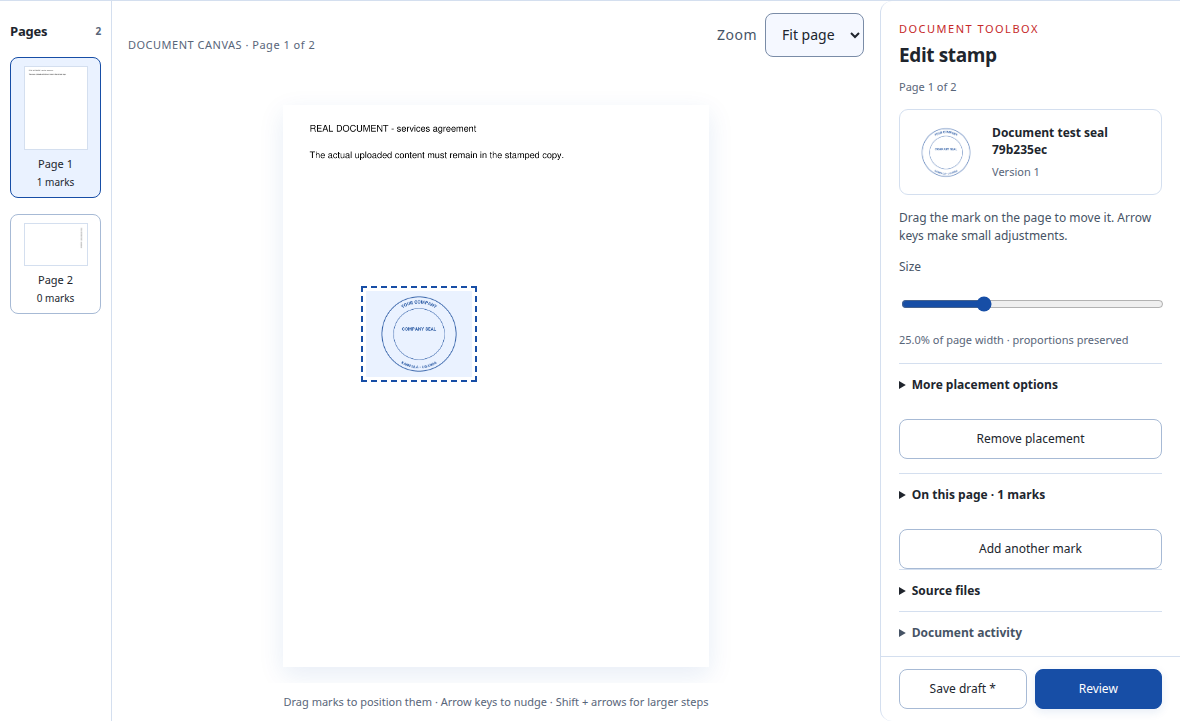
Open Add mark on a phone, choose Stamp and select your saved version. Choose Place stamp and tap the intended area, or choose Place in centre and move it. Use Size to keep the stamp readable without covering the closing, reference or totals.
4. Add your own signature if needed
Choose Add another mark, then Signature. Use your saved signature image or Type instead. Choose Place signature, position the mark and review it. Saved personal signatures are private to their account; team stamp access is separate.
5. Review and share the PDF
Select Review document, check each page and confirm the page checks. Authorise your signature if one is included. Choose Create stamped PDF and Download stamped PDF. Inspect the downloaded copy and send it through your usual email or document channel.
Before you send the finished file
Check the recipient, reference, amounts and company wording. Make sure the stamp and signature are legible and do not hide the text. Keep your original source file for future corrections.
Cigned keeps the original document. Creating a new completed copy does not change an earlier output.
If something needs adjusting
The closing moved to another page
Adjust the source document’s layout and upload again. Check the prepared PDF before adding marks.
Only the last page needs the stamp
Place the stamp on that page, or use More placement options → Repeat placement → Last page and Apply to selected pages. Inspect the placements on all pages afterwards.
You need to pause for approval
Choose Save draft. Review the saved placements when you return before creating a completed PDF.